
Developer Environment Setup guide to run the project after purchasing the source code from us
Get Your Dev Environment
Ready in 5 Easy Steps
Follow this guide to install everything you need to open, run, and customise the Extreme Office ERP source code on Windows 10 or 11.
⬇Download dev-env.7zMirror 1 — transfer.it
⬇ Download dev-env.7zMirror 2 — Google Drive
⚠️
Before you start: Make sure you are running Windows 10 or Windows 11 (64-bit). These installers will not work on 32-bit Windows or macOS/Linux. You will also need approximately 8 GB of free disk space and a stable internet connection to activate Visual Studio.
Step-by-step installation
Install all 5 prerequisites — in order
Each tool must be installed in the order shown below. Do not skip steps or change the order.
What you will install
First — Extract the dev-env.7z file
You need 7-Zip to extract this archive. It’s free and takes 30 seconds to install.
Before anything
1
Download and install 7-Zip from www.7-zip.org (it’s completely free)
2
Download dev-env.7z using one of the download buttons at the top of this page
3
Right-click the downloaded dev-env.7z file → select “7-Zip” → click “Extract Here”
4
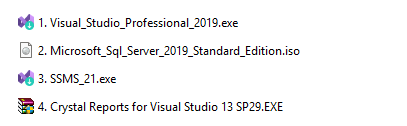
You will now see a folder with exactly these 5 files inside — keep the folder open for the steps below
💡
The extracted folder contains exactly the files you need, pre-matched to the correct versions. Do not download these tools from the internet separately — use the ones in the package to avoid version mismatch issues.
1
Visual Studio Professional 2019
The main code editor — where you will open, edit, and run the ERP source code.
~30 min install
🎨 1. Visual_Studio_Professional_2019.exe · 3,675 KB
1
Double-click 1. Visual_Studio_Professional_2019.exe
2
If Windows asks “Do you want to allow this app to make changes?” — click Yes
3
The installer will start downloading components. When you see the Workloads screen, tick the box for “ASP.NET and web development”
4
On the right side panel, scroll down and also tick “.NET Framework 4.7.2 targeting pack”
5
Click “Install” (bottom right) and wait — this takes 20 to 40 minutes depending on your internet speed
6
When done, click “Launch” — Visual Studio will open and ask you to sign in. You can click “Not now, maybe later” to skip
7
Close Visual Studio for now — we’ll come back to it after the other tools are installed
🚫
Important: Do NOT install Visual Studio 2022 or any other version. The project is specifically built for Visual Studio 2019. Using a different version may cause errors when opening the project.
☕
This is the longest step. While it installs, grab a coffee — it can take up to 45 minutes on a slow connection. The progress bar will keep moving as long as it’s working.
2
Microsoft SQL Server 2019 Standard Edition
The database engine that stores all the ERP data — customers, inventory, accounts, everything.
~15 min install
🗄️ 2. Microsoft_Sql_Server_2019_Standard_Edition.iso · 1,393,286 KB (1.3 GB)
1
Double-click the .iso file — Windows will automatically mount it as a virtual DVD drive. You will see a new drive letter appear in File Explorer (like D: or E:)
2
Open that new drive in File Explorer and double-click setup.exe
3
The SQL Server Installation Center opens. Click “Installation” on the left sidebar
4
Click “New SQL Server stand-alone installation or add features to an existing installation”
5
Accept the license terms and click Next through all the screens — the default settings are fine
6
On the Instance Configuration screen — leave it as “Default instance” (do not change the name)
7
On the Database Engine Configuration screen — select “Mixed Mode” and set a password for the SA account. Write this password down — you will need it later!
8
Click Install and wait for it to complete, then click Close
💜
What is Mixed Mode? It means both Windows login AND a username/password login will work. We need this so the ERP application can connect to the database using a username and password.
✏️
Write down your SA password! You will need to enter it when configuring the ERP connection later. If you forget it, you will need to reinstall SQL Server.
3
SQL Server Management Studio 21 (SSMS)
A visual tool to manage your database — think of it as a control panel for your SQL Server.
~5 min install
🔧 3. SSMS_21.exe · 4,352 KB
1
Double-click 3. SSMS_21.exe
2
Click Install on the first screen — no options need to be changed
3
Wait for installation to complete (about 3–5 minutes), then click Restart if prompted — otherwise click Close
4
After install, open SSMS from the Start menu. In the login box, Server name should show localhost or your computer name. Authentication: SQL Server Authentication. Login: sa. Password: the one you set in Step 2
5
Click Connect — if you see the Object Explorer panel load with your server name, SQL Server is working correctly! 🎉
💡
What does SSMS do? It lets you restore the database backup file (BhuiyanCrock_DB.bak) that comes with the ERP source code, and see all your tables and data. You’ll use it in the ERP setup guide.
4
Crystal Reports for Visual Studio 13 SP29
This plugin lets Visual Studio open and edit the ERP’s 150+ built-in report files (.rpt).
~3 min install
📊 4. Crystal Reports for Visual Studio 13 SP29.EXE · 383,636 KB
1
Make sure Visual Studio 2019 is fully closed before running this installer
2
Double-click 4. Crystal Reports for Visual Studio 13 SP29.EXE
3
Accept the license agreement and click Next through all screens — do not change any default settings
4
Click Install and wait for it to finish (2–4 minutes)
5
Click Finish when done
⚠️
Version must match exactly. This must be SP29 specifically. Installing a different Service Pack version will break all reports in the ERP. Always use the file from this package — never download it separately from SAP.
5
Restart your computer — this is important to make sure all the Crystal Reports components are properly registered in Windows
🔄
Why restart? Crystal Reports registers itself deep in Windows after install. Without a restart, the ERP will throw a “report load failed” error even though everything appears to be installed correctly.
🎯
Difference between Step 4 and Step 5: Step 4 (Crystal Reports for VS) lets you edit report files inside Visual Studio. Step 5 (Crystal Reports Runtime) lets the live web application display those reports to users in the browser. You need both.
✅ Quick verification checklist — tick each one before opening the project
Visual Studio 2019 opens without errors SSMS connects to SQL Server using SA credentials Crystal Reports for Visual Studio visible in VS under Help → About (listed as an installed product) Computer restarted after Crystal Reports Runtime install SA password is written down and safely stored
🎉
Your dev environment is ready!
All prerequisites are installed. You can now open the Extreme Office ERP project in Visual Studio, restore the database, and run the system. Follow the full setup guide for the next steps.
Live Demo URL
Username: rony
Password: demo2026
Open Live Demo →Full Setup Guide (PDF) →
Extreme ERP — Developed & distributed by Alwajeez Tech, Jeddah, KSA | sales@alwajeeztech.com | WhatsApp +966 55 894 7166